Using Fill-In-The-Blank Form Fields in Snippets
How to use Fill-in fields
Not able to play the video? Click here to watch the video
Overview
Fill-ins make your Snippets dynamic and flexible. Instead of creating multiple versions of the same Snippet, you can add customizable elements like fill-in-the-blanks, dropdown menus, optional sections, and date pickers. This allows you to quickly and easily personalize your content upon expansion, saving you time and ensuring a consistent, personal touch in your communications.
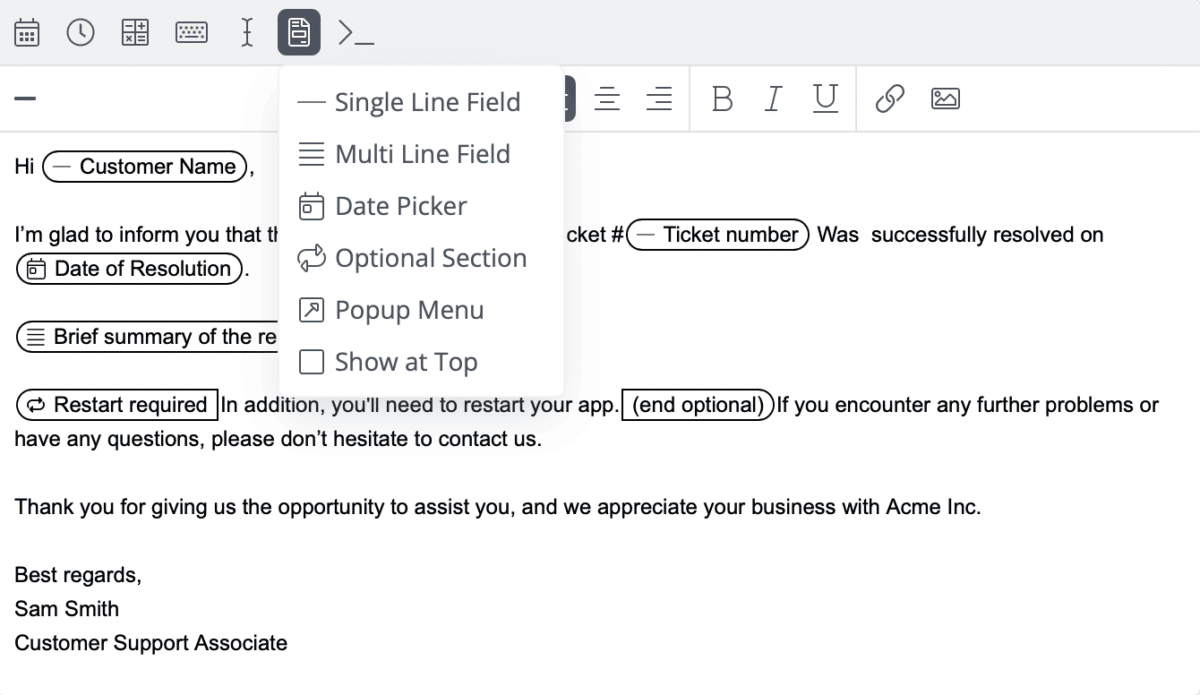
Here is an example of a snippet with Fill-in fields in action:

Fill-in Types
There are five types of Fill-ins you can use to customize Snippets.
Single Line Field
This is a small text box for a single word or a short phrase. It’s ideal for adding quick, dynamic details like a customer’s name, a patient ID, or an order confirmation number. Learn more about the Single Line Fill-in here.
Multi-Line Field
This is a larger text box designed for longer content, such as multiple sentences or even full paragraphs. Use it for things like adding detailed notes, personalized introductions, or comprehensive follow-up instructions. Learn more about Multi-Line Fill-ins here.
Date Picker
The date picker provides a calendar for selecting a specific date each time you expand. You can choose a date in the past, present, or future, making it perfect for scheduling appointments, noting birthdays, or including key event dates. Learn more about the Date Picker Fill-in here.
Popup Menu
The dropdown menu gives you a predefined list of options to choose from. This is perfect when you need to select from a few standard choices, like a list of providers or office locations. Learn more about the Popup Menu Fill-in here.
Optional Section
An optional section is a block of text that you can either include or exclude when you expand a Snippet. This is useful for content that is sometimes relevant but not always necessary, like a disclaimer, specific patient instructions that only apply in certain circumstances, or a promotional offer. Learn more about the Optional Section Fill-in here.
Creating a Fill-in Snippet
- Create a new snippet by selecting in the TextExpander menubar under File > New Snippet.
- Choose the button located at the top of the snippet editor and select one of the options. A dialog will appear to let you customize some of the field’s options.
- You will notice a fifth option, “Show at top.” This will allow all the Fill-in fields to appear at the top of the Fill-in window, useful if you create a long snippet with lots of fields.
- Set your field’s options, including the field name.
- Field name:
This helps you remember what to fill the field with as you use the snippet, and let’s TextExpander recognize different fields. If two different Fill-in fields of the same type have the same Field Name they are treated as one. Meaning, as you fill out one field, the other will fill with the same text.
- Field name:

- Select to close the popup dialog. Double-click on the field’s entry to open the dialog and edit the field’s properties again.
Popup Dialog
All of the fields are optional. The Fill-in will work even if you don’t change any of the defaults. Note: All Fill-ins with the same Field Name will have the same value, so will be filled the same.
- Field Name
- descriptive name helps you organize if you have several fields. For example: “name”, “date”, “quantity”, etc.
- Default Value
- You may leave this field blank. If you have nothing specific to put in this field at the time you expand the snippet, you may want some default text which will always appear there instead. In the case of this example, if you do not know the customer’s first name, some default text for the customer name field might be “Sir/Ma’am.” You can also include dates and times in this field.
- Width
- The visual width of the field as you expand it. The default width is 20, shown in the example snippet above for the “customer name” field. The quantity field in the example has a specified width of 4. This is purely for your visual preference when viewing the snippet in the expansion window.
Features
- Access Fill-ins via the Fill-in button in the editing bar at the top of the snippet editor.
- Double-click within a field entry to edit it in a popup dialog.
- Expand other snippets into the Fill-in fields in the expansion window.
- Switch applications without dismissing the Fill-in window.
- Text and popup Fill-in fields support default values.
- “Show at top”: For longer snippets, display the fields at the top of the Fill-in window to make filling out the fields easier. This also works for longer script snippets.
- Type, copy/paste, or expand other snippets in the single-line and multi-line fields.
Advanced: Fill-in Syntax
Fill-ins appear as visual blocks. However, if you wish to see and edit the macro syntax used to make them, you may switch your snippet’s Content: menu from “Plain Text” or “Rich Text” to one of the script formats, such as JavaScript to see it and edit it.
- Single-line fields
Syntax:
%filltext[:name=<field name>][:default=<default value>][:width=<width>]%
Field name, default value, and width are all optional. Default width is 20.
Example:
%filltext:name=quantity:default=1:width=4%
- Multi-line fields
Syntax:
%fillarea[:name=<area name>][:default=<default value>][:width=<width>][:height=<height>]%
Area name, default value, width, and height are all optional. Default width is 30. Default height is 5.
Example:
%fillarea:name=custom:default=Thanks for ordering from Acme Widgets. We are a family owned business, established in 1891. We really appreciate your business.:width=40:height=4%
- Popup menus
Syntax:
%fillpopup[:name=<popup name>]:[default=]<value>:[default=]<value>…%
Name is optional. At least one <value> should be specified. Multiple <value>s are encouraged. If no default is specified, the first <value> will be the default.
Example:
%fillpopup:name=ship timeframe:today:default=tomorrow:next week%
- Optional sections
Syntax:
%fillpart[:name=<section name>]:[default=yes'no]%<content of optional section>%fillpartend%
Example:
%fillpart:name=Payment Due:default=yes%You did not include payment information with your order. Please call our office at 555-1212 to provide payment details.%fillpartend%
Name is optional. Default is optional: yes or no; if not specified, no is used. Content can contain other fill-ins.
- Show at top
Syntax:
%filltop%
Place this macro anywhere in the snippet content, including nested snippets, for it to have the effect of displaying fields at the top of the Fill-in window upon snippet expansion.
Additional Details
When edited in this way, Fill-in field names and default values cannot contain % (percent sign) or : (colon). (They can contain these characters when the snippet type is Plain or Rich text.)
If two Fill-in fields in a snippet have the same name, their value will be synchronized when you expand the snippet.
(For more macros, see Date, Time, and Math Macros and Advanced Snippet Functions: Macros).