
Not able to play the video? Click here to watch the video
As “Best of 2017” and “Tech Tools To Try” lists flood the internet, the beginning of a new year is a perfect time to not only reflect and explore but to optimize the tools we loved most in 2017.
TextExpander is loved by many for its simplicity, but has a great depth of features which can only be appreciated over time – much like fine wine!
Even if you’ve used TextExpander for years, there’s always more to learn to make your snippets work harder.
Ever wonder how to customize an existing snippet with more rich detail? TextExpander Fill-ins allow you to personalize your snippet (or chunk of text).
Fill-ins In Action
From marketing to recruiting to sales, communicating via email is a huge part of the job. Personalization is a key factor in building a passionate audience and increasing conversions.
In fact, email personalization has been found to boost email open rates by 26%, and click-through rates by 97%.
When you’re ready to add a bit of customization to your established snippets, follow these steps.
Step 1
Select or create your snippet.
Step 2
Determine your variables. To do this, ask yourself which aspects of your message would benefit from being tailored to your audience?
In this example, a recruiter would like to customize three specific items within the text of an email message:
- Candidate’s Name
- Hiring Manager’s Name
- Sign-off Greeting
Step 3
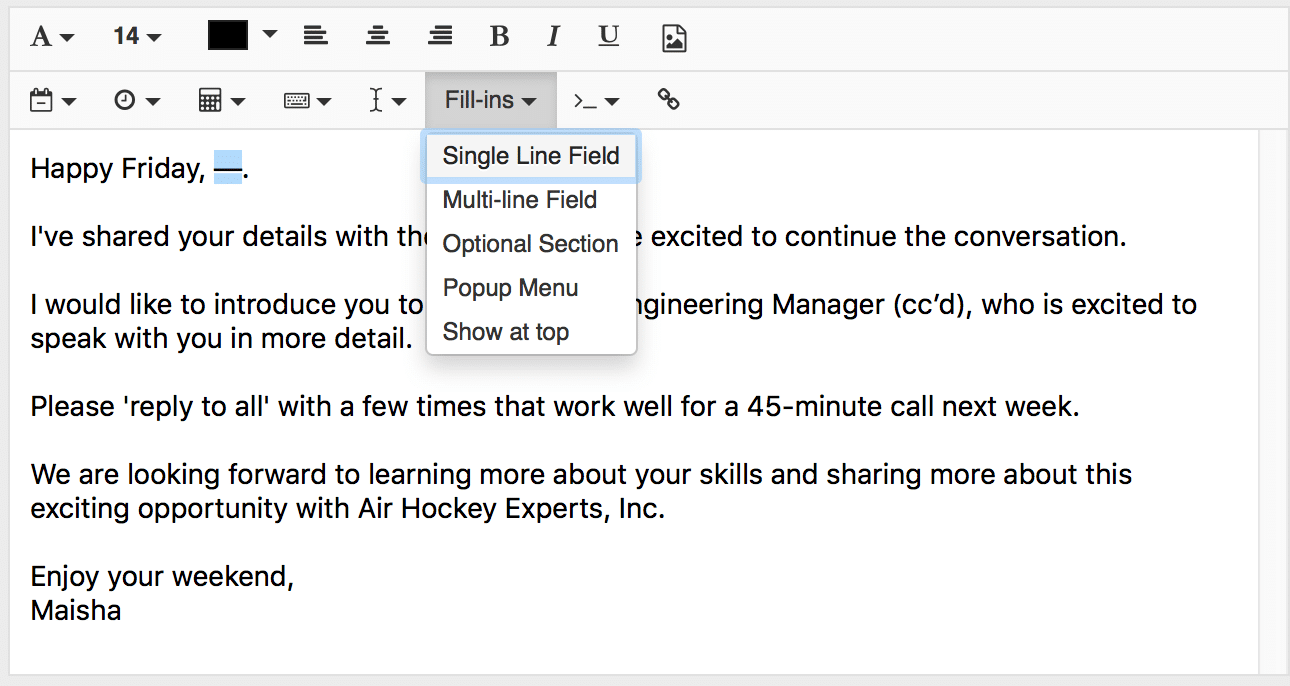
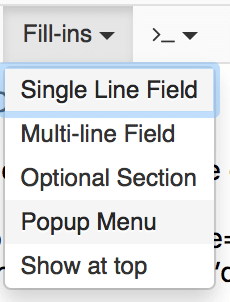
Insert a “Fill-in” field into your snippet. The Fill-in drop-down menu provides these options:
a) single-line field (for a one-liner),
b) multi-line field (for a block of text),
c) popup menu (for multi-option drop downs), and
d) optional selection (for a section of pre-written text you may want to include).
You can explore each of these options in more detail on our help pages.
Here, a single line field is inserted to prompt the input of the Candidate’s Name.
Step 4
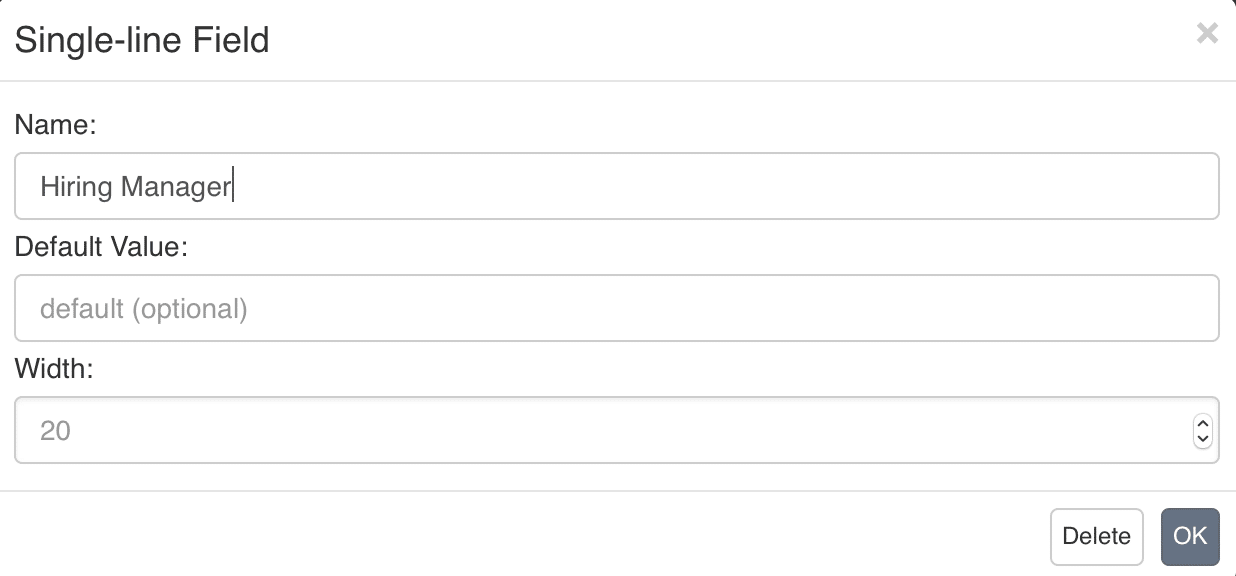
After selecting Single Line field from the Fill-in drop-down menu, enter a name for the field.

The Name field is titled “Candidate” since it will prompt the user for the candidate’s first name.
Leave the other options as is and click OK. Your first Fill-in is complete!
Continue to repeat these four steps for any additional sections of text you’d like to customize.
Single-Line Fields and Popups
Here, the recruiter would like to customize the message with the Hiring Manager’s name.

Select Single-line field from the Fill-In option drop down.
Again, enter a custom name for the field.
Finally, the Fill-ins Popup Menu option allows the recruiter to customize the sign-off.
Select the desired text, then select Popup Menu from the Fill-ins drop-down to create a menu of choices for your selected text.
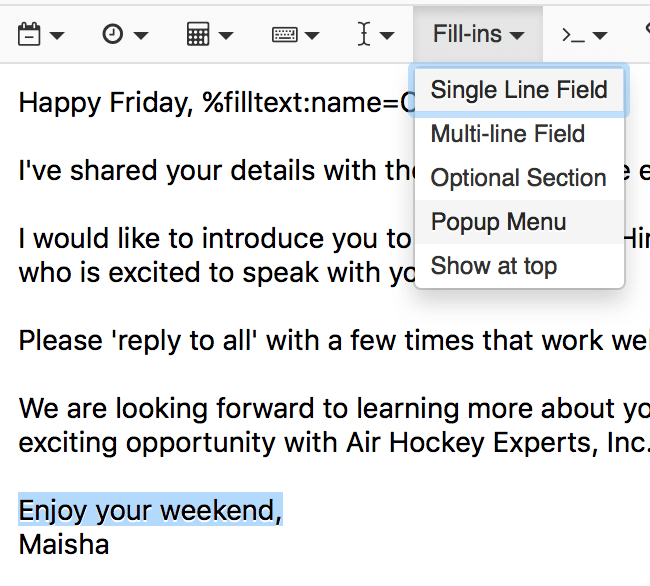
Customize the Popup Menu with your choice of text. Here, the recruiter enters three options for the sign-off:
- Warmly,
- Have a great day,
- Enjoy your weekend,
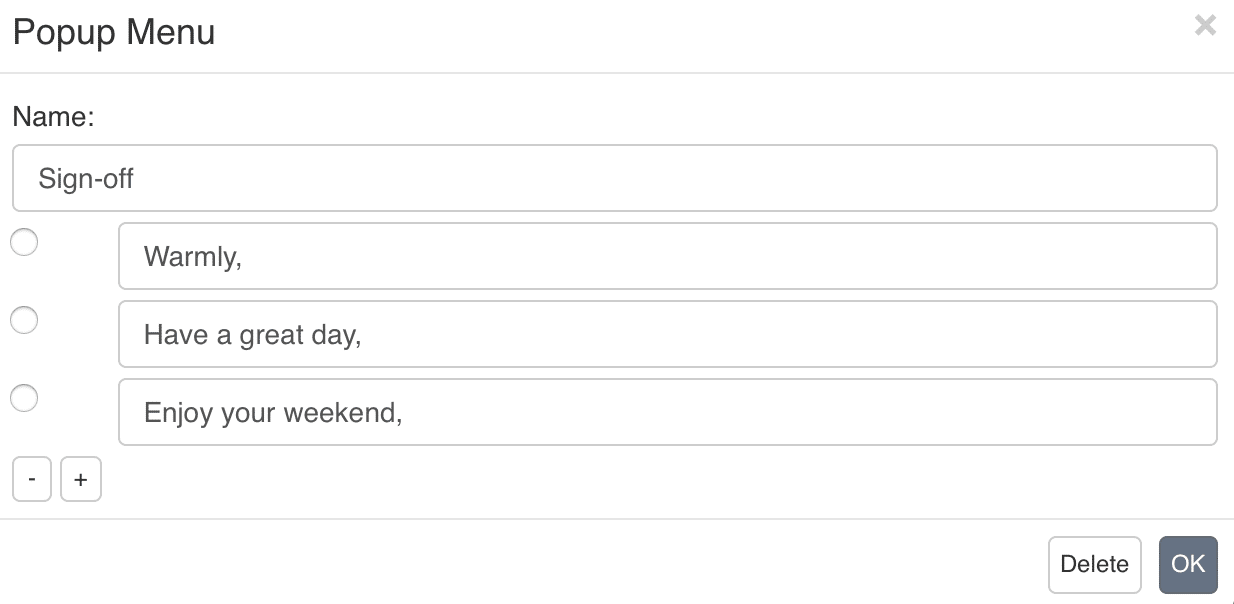
Click OK.
Now it’s time to activate the snippet and see your Fill-in in action.
Type in your snippet abbreviation, fill in the custom fields, then click OK.
Not able to play the video? Click here to watch the video
The finished product (above) is a personalized email that saves the same time and effort as a standard snippet.
More to Explore
To explore more about Fill-ins, check out this video from the TextExpander library. What Fill-ins are you using to customize your messaging? Let us know @TextExpander.

'%3e%3cg id='Final-Copy-2_2_' transform='translate(1275.000000, 200.000000)'%3e%3cpath class='st0' d='M7.4,12.8h6.8l3.1-11.6H7.4C4.2,1.2,1.6,3.8,1.6,7S4.2,12.8,7.4,12.8z'/%3e%3c/g%3e%3c/g%3e%3c/g%3e%3cg id='final---dec.11-2020'%3e%3cg id='_x30_208-our-toggle' transform='translate(-1275.000000, -200.000000)'%3e%3cg id='Final-Copy-2' transform='translate(1275.000000, 200.000000)'%3e%3cpath class='st1' d='M22.6,0H7.4c-3.9,0-7,3.1-7,7s3.1,7,7,7h15.2c3.9,0,7-3.1,7-7S26.4,0,22.6,0z M1.6,7c0-3.2,2.6-5.8,5.8-5.8 h9.9l-3.1,11.6H7.4C4.2,12.8,1.6,10.2,1.6,7z'/%3e%3cpath id='x' class='st2' d='M24.6,4c0.2,0.2,0.2,0.6,0,0.8l0,0L22.5,7l2.2,2.2c0.2,0.2,0.2,0.6,0,0.8c-0.2,0.2-0.6,0.2-0.8,0 l0,0l-2.2-2.2L19.5,10c-0.2,0.2-0.6,0.2-0.8,0c-0.2-0.2-0.2-0.6,0-0.8l0,0L20.8,7l-2.2-2.2c-0.2-0.2-0.2-0.6,0-0.8 c0.2-0.2,0.6-0.2,0.8,0l0,0l2.2,2.2L23.8,4C24,3.8,24.4,3.8,24.6,4z'/%3e%3cpath id='y' class='st3' d='M12.7,4.1c0.2,0.2,0.3,0.6,0.1,0.8l0,0L8.6,9.8C8.5,9.9,8.4,10,8.3,10c-0.2,0.1-0.5,0.1-0.7-0.1l0,0 L5.4,7.7c-0.2-0.2-0.2-0.6,0-0.8c0.2-0.2,0.6-0.2,0.8,0l0,0L8,8.6l3.8-4.5C12,3.9,12.4,3.9,12.7,4.1z'/%3e%3c/g%3e%3c/g%3e%3c/g%3e%3c/g%3e%3c/svg%3e) Your Privacy Choices
Your Privacy Choices